Monday, April 7, 2014

Almond Milk.... mmmmm......

We love almond milk in our house. We use it on cereal, in oatmeal, in coffee... well, you get the idea.

If you have purchased almond milk lately, you know it can get a little pricey. It is usually around $4.00 a carton.

So, I decided to make my own.  I found a recipe in Clean Eating Magazine and kind of mixed it up a bit to make it my own.  I couldn't find the recipe online, but it is in their March 2014 issue.

Here is what you need: 


1 cup of blanched almonds (I used blanched almond slivers, it's what they had at Sprouts)
1/2 cup of unsweetened shredded coconut


That's it. Really.

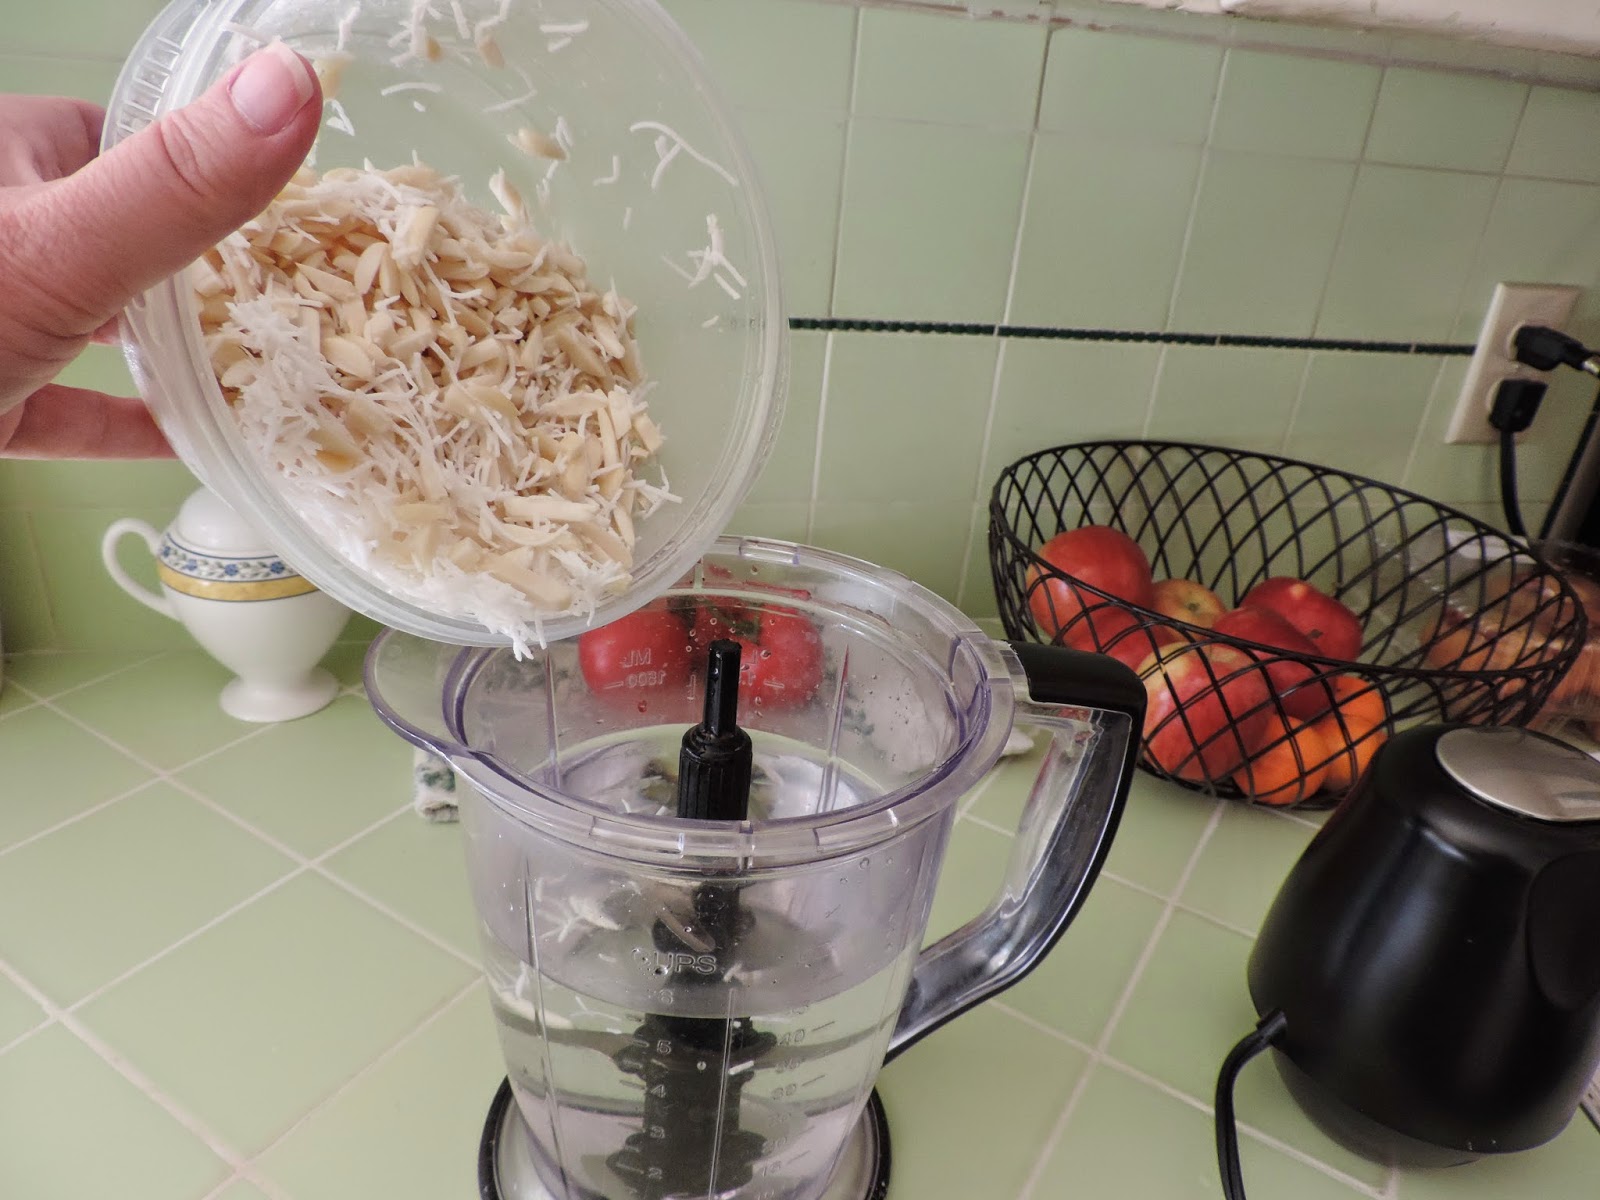
Put your almonds and coconut in a bowl and cover with water. Leave overnight to soak.  It softens them up and makes them easier to blend.


Put the nuts in your blender and add 3  cups of water. Blend until smooth.


Strain liquid into a pitcher.  Put the pulp into a towel as you go along. When you have it all, squish it back into the clean blender and then add to the pitcher. The recipe in Clean Eating said to use a "nut bag".  I don't have one, but if I keep making homemade almond milk, I may get one.  With the nut bag, you just pour the whole mixture into the bag and then it strains it and you can squeeze the pulp from there. It looks pretty cool.


There you have it. Almond milk. 


You can add some vanilla if you like. Or cinnamon. Or whatever you want.  If you like it creamier, add less water.  If you like it thinner, add more water.  You can try it with oatmeal or cashews, or even make straight coconut milk. 

Refrigerate and it should last 4 - 5 days.  You may need to give it a little shake shake before using because it might separate a little bit. 

My total cost for this was about $3.50.  Yes, it's almost the same as buying almond milk at the store, but it is fresh, has no preservatives and I get the satisfaction of making it myself. 

Saturday, June 16, 2012

Father's Day Fun

I saw this idea on Pinterest (as usual). Robbie and I had a great time creating it.

We made a long list of different candies we wanted to get. I gave him the list and he picked them all out. We ended up going to three different stores to get everything we needed. It was a lot of fun.

Very excited to give this card!


Here is the written text of what we made, in case you cannot read it from the picture.

Dad, We were going to give you a Whopping bunch of Gold Coins to go on a shopping Spree for Father's Day, but the money slipped through our Butterfinger's. We didn't have an Extra Whatchamicallit to sell, and it wasn't Payday. We didn't think a pet KitKat, a trip to New York, or an Orbit around the Milky Way would be appropriate. We do with you Mounds of Almond Joy as you eat this card. We hope it doesn't make you Rolover and get sick. If it does, we promise not to Snicker or Look.
Have a Good & Plenty Father's Day!
Love, your favorite Air Heads..... 

Enjoy your Father's Day!


Friday, June 15, 2012

Summer is here!

Summer is here! Well, not officially summer. But summer vacation is here. I like to try new things and my goal this summer is to try at least one new, completely different recipe each week.  One of my most favorite summer flavors is coconut. It reminds me of suntan lotion and Maui. Let's all pause and have our own personal Maui moment.......

Okay, now that we're all relaxed and in the mood for a little tropical flavor, let's make Coconut Macaroons. I have never made them before. But, they don't look that difficult and I have everything here at home. So, here we go.

Coconut Macaroons


What you will need:

4 egg whites (room temperature)
2/3 cup of sugar (I used the sugar substitute, Splenda)
1/2 tsp vanilla extract
1/ 4 tsp salt
2 1/2 cups unsweetened shredded coconut


Preheat oven to 325.  Lightly grease baking pan.

Beat the egg whites at medium speed until slight peaks form. Slowly add sugar, vanilla and salt. Once fully incorporated, beat at high speed until firm peaks form. Gently fold in the coconut.

Spoon about a tablespoon amount onto baking pan.

Bake for 15 minutes.  Let cool on baking pan for a few minutes to firm up, then transfer to a cooling rack.


Oh yes, I am sure my husband will be pleased. I ate two. Really. Only two. I promise. They are light as a cloud. I mean really amazingly light. And the flavor is great. I hope you enjoy them as much as we will.


Sunday, June 10, 2012

Oh, you're supposed to actually do the pin's.....

Finally, I finally actually did a pinterest craft. I am really good at pinning. Really good. And, I'm pretty good at trying the recipes that I pin. Not so good at actually doing the hands on crafts though.So, I finally tried one. Of course, in usual Sunny fashion, I changed it a bit.

Here is the link to the original pin Easy Confetti Tumblers.  The blogger did a great job on her tumblers. They are really pretty. She did so well and made it look so easy that I had to try it for myself.

I had everything I needed already. (Which may explain why this is the only craft I have ever done from pinterest.)

Here's what I used:
  • Two wine glasses (Who doesn't have a ton of extra wine glasses in the house... really?)
  • Acrylic paints (In this case, regular old Crayola paints taken from Robbie's art box in his room.. shhhhh....)
  • Top coat nail polish (Yes, it's Opi. But, it's all I had. Next time I will buy a cheap brand instead of wasting my Opi)

The original blogger did these really pretty little dots on hers. I tried that. It didn't work so well for me. The glory of this project is that if you don't like what you did, you can just wash it off. I ended up doing a nice little "swiping" motion with my paint brush.


I started with the lighter color, overlapping some of the brush strokes. Then I added the darker color. More as an accent.


I love green colors. And I think it will look good with a nice chardonnay in the glass.
The other glass I made was orange and red. It will look great with a red wine. Some of you will say, "But Sunny, you used two white wine glasses. Shouldn't you have used a red wine glass too?" Well, yes I should have. And I even have some plain red wine glasses, but, honestly, I didn't think about it until after I had painted. So, there you go. I will do some red wine glasses though.  Because I really like it.

 Once the paint dries, go over your painted area with the nail polish. Only polish over the painted area. You don't want to use the acrylic paints or the nail polish up close to the rim of your glass. Not good at all.  


Let it all dry and then enjoy. This will look great on tumblers or stemless wine glasses. Oooohhhh and on martini glasses and margarita glasses too. I may have to return Robbie's paints and get my own if I keep this up.

Enjoy my friends, enjoy.


Sunday, May 27, 2012

Memorial Day Weekend


I want to say happy Memorial Day to you all. And give a big thanks to all of the men and women who protect us and keep us safe. Thank you for all that you do; for your time, your sacrifice and your service.

Can you believe that it is already Memorial Day weekend?  Robbie has two more weeks of Kindergarten and then the summer officially begins here. Let's hear it for summer!

I am looking forward to fun summer activities with my family. Lots of fun, lots of adventures and lots of cooking :)

My wonderful husband has been in the mood for s'mores lately. I have no idea why. He just has. Thanks to pinterest, I found an abundance of s'more related recipes. So, in true Sunny fashion, I chose three recipes and mixed them together to create my own peanut butter s'more cups.

Peanut Butter S'More Cups

 What you'll need:


  • 8 whole graham crackers (not 7 and not 9)
  • 1/4 cup of powdered sugar
  • 1/3 cup melted butter (and I mean butter, not margarine....)
  • 1/8 tsp of vanilla
  • 1/8 tsp instant coffee
  • 12 large marshmallows 
  • 6 regular size Reese's Peanut Butter Cups or 24 mini Reese's Peanut Butter Cups
  • 2 milk chocolate bars


Preheat your oven to 350. Put your graham crackers in a large resealable bag and then smash to smithereens. Pulvarize those puppies. Take out your aggressions. Do whatever it takes to make those graham crackers into dust. Of course, you could always just put them in a food processor. But where is the fun in that.

Put the graham crackers into a bowl and add the powdered sugar, melted butter, vanilla and instant coffee. Mix all together. Add a tablespoon full of mixture to each cup of a mini muffin pan. (If you do not have a mini cupcake pan, I suppose you could use a regular muffin pan and just adjust the portions to fit.) Use a rounded spoon, measuring spoon, or your fingers (wet with water so the mixture doesn't stick) and create a little bowl in the muffin tin. Press the graham cracker mixture against the bottom and sides of the pan. Bake in oven for 5 minutes.

While these are cooking, cut your Reese's Peanut Butter cups into 1/4's. If you are using mini Reese's, no cutting is needed. Cut your marshmallows in half. Remove from oven and place a 1/4  peanut butter cup (or whole mini Reese's) in center of graham cracker bowl.  Top with a marshmallow (cut side down). Put back in oven and cook for an additional 2 minutes. The marshmallows will look like soft little warm pillows. Mmmm.... warm marshmallows.... yum.

Remove from oven. Let cool in muffin pan for about 10 minutes. Carefully remove  cups from the muffin pan. I used a teaspoon and gently spooned them out. They held up quite nicely. I only had one casualty that didn't survive the removal. I promptly ate the evidence.

Let the marshmallows cool completely. Melt the 2 milk chocolate bars in the microwave. Dip each cup marshmallow side down into the milk chocolate. Just enough to coat the top of the marshmallow. Place back on cooling rack to cool and set. About 45 minutes. Not that anyone in my house bothered to wait 45 minutes for them to cool. I barely had them dipped in the chocolate and my husband had already ate 3 of them.

Makes 24 mini cups.

Enjoy.  And have a great Memorial Day. Please say thank you to those who serve our country. They deserve our gratitude and so much more.


Thursday, April 26, 2012

I'm back........

After a brief absence, I have returned. I admit, the holidays were busy. I stopped posting to the blog. Well, it's April now... I don't suppose I can use the holidays as an excuse any more.

I look forward to posting again. I have re-vamped the blog a bit. I now have a "Win Win Win" tab. this is full of fun Instant Win Games and Sweepstakes you can enter. I will be updating the page as I discover new IWG's and the existing ones end.

Life has been busy for me in the last few months. Robby turned 6, Kindergarten is almost over, and summer is almost here. I look forward to sharing stories, recipes, fun and adventures with you all.

Thanks for checking back...

Sunny

Friday, November 25, 2011

Easy Holiday Treats

My sister requested that I post a few more easy holiday treats. Here is one I made for Thanksgiving and will make again for Holiday get-togethers.

I have no idea what this treat is called. I found it on pinterest (again, I know). It is almost like a chocolate turtle candy, but on a pretzel. So you get your salty and your sweet fix in one bite. I love that.

What you will need: Those wonderful little square pretzels (the ones I get are called "butter pretzels"). If you cannot find the little square ones, than regular mini pretzels will work as well. One bag of rolos. A bag of halved pecans.

This is another super easy recipe. I promise you, your friends will love it and will want to make it for their next party.


Preheat oven to 250. Line baking sheet with foil. Place pretzels on foil. Place one rolo on each pretzel. Bake for 5 minutes. No longer. Really. They will be soft but not melted. Take them out of the oven and immediately place a pecan half on top of the rolo. Gently press down so it squishes into the rolo.

Put the pan in the refrigerator for about ten minutes to harden the rolos up again.


I also made these with m&m's instead of pecans. They were really good. And quite colorful and festive.

Like I said, these are super easy to make. Great for a party. One bite of salty & sweet yumminess.